Craving a sweet and cool treat? I’ve got just the thing for you! Strawberry Cheesecake Ice Cream is a smooth and creamy delight that bursts with flavor. In this guide, I’ll walk you through easy steps to make this luscious dessert at home. You’ll learn about the best fresh ingredients, perfect techniques, and fun variations. Let’s dive into this delicious recipe that will make your taste buds sing!
Why I Love This Recipe
- Fresh Flavor: This ice cream captures the essence of summer with the bright, juicy taste of strawberries.
- Easy to Make: With simple ingredients and straightforward steps, anyone can whip this up in no time.
- Creamy Texture: The combination of cream cheese and heavy cream creates a rich and luxurious mouthfeel.
- Perfect for Any Occasion: This treat is ideal for summer gatherings, birthdays, or just a sweet way to cool down!
Ingredients
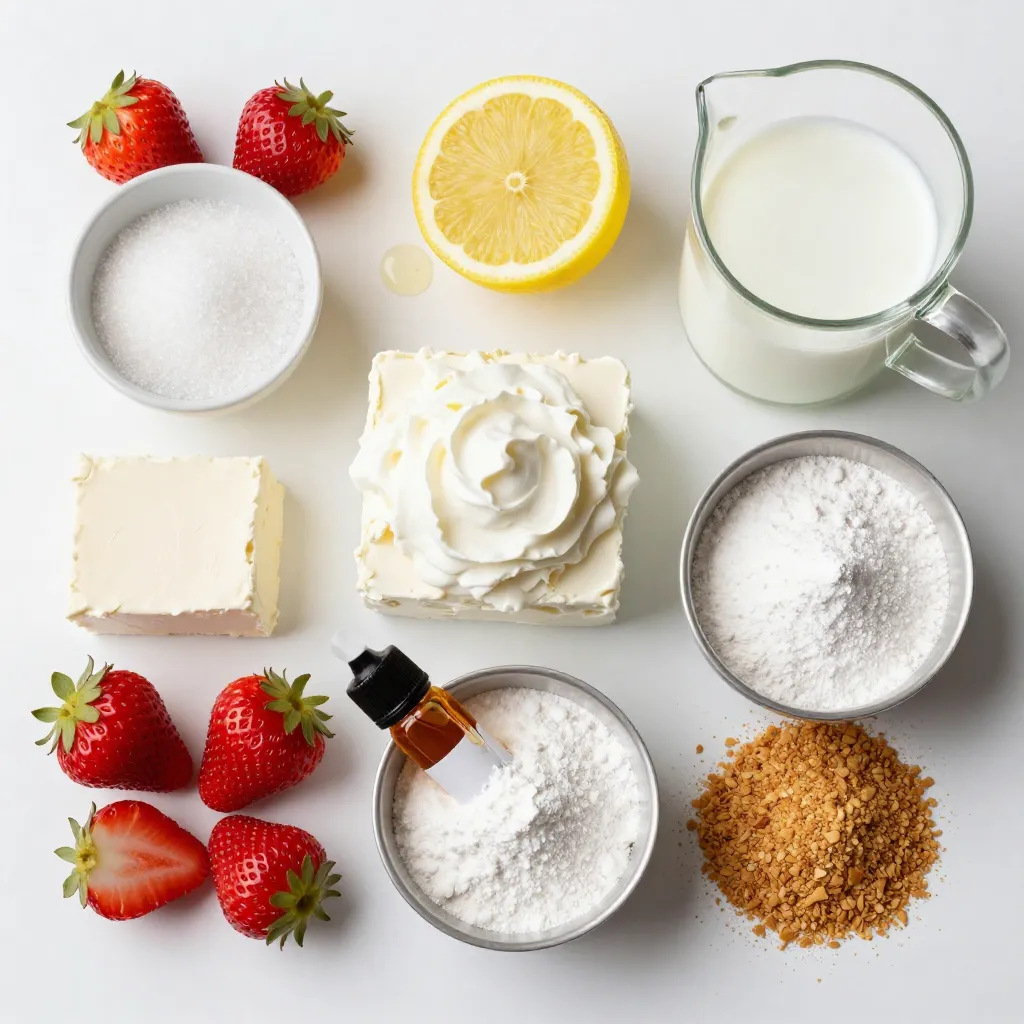
Fresh Ingredients
For this creamy treat, you need fresh strawberries for the best taste.
– 2 cups fresh strawberries, hulled and halved
– 1 tablespoon lemon juice
– 1/3 cup granulated sugar, divided
The lemon juice brightens the flavors and balances the sweetness. Let the strawberries sit with the sugar. This step helps them release their juicy goodness, which adds depth to your ice cream.
Dairy Essentials
Next, you need some rich dairy to make it creamy and dreamy.
– 1 1/2 cups cream cheese, softened
– 1 cup heavy cream
– 1/2 cup whole milk
– 3/4 cup powdered sugar
– 1 teaspoon vanilla extract
Softened cream cheese gives a smooth texture. The heavy cream and whole milk create a rich base. Vanilla adds a nice touch of flavor.
Sweeteners and Fillers
We also need sweeteners to make your ice cream extra yummy.
– 2 tablespoons granulated sugar (for the strawberries)
– 3/4 cup powdered sugar (for the mix)
– 1/2 cup crushed graham crackers
The granulated sugar sweetens the strawberries. The powdered sugar adds sweetness and fluffiness to the cream mixture. The crushed graham crackers give a nice crunch, just like a real cheesecake!
Step-by-Step Instructions
Preparing the Strawberries
First, take 2 cups of fresh strawberries. Remove the stems and cut them in half. In a medium bowl, mix the strawberries with 1 tablespoon of lemon juice and 2 tablespoons of granulated sugar. Toss them well and let them sit for 30 minutes. This wait helps the strawberries release their sweet juices. After 30 minutes, use a blender or food processor to puree the mixture. Make it smooth, but leave some chunks for texture. Set this strawberry puree aside for later.
Making the Cheesecake Base
In a large bowl, beat 1 1/2 cups of softened cream cheese with an electric mixer. Keep mixing until it is very smooth. Gradually add the remaining 1/3 cup of granulated sugar while mixing. Once combined, add 1 cup of heavy cream, 1/2 cup of whole milk, 3/4 cup of powdered sugar, and 1 teaspoon of vanilla extract. Whip this mixture until it is light and fluffy, forming soft peaks. This is the creamy cheesecake base that gives our ice cream its rich flavor.
Combining and Freezing the Mixture
Now, gently fold the strawberry puree into the cheesecake base. Be careful not to deflate the mixture. You want to keep it airy and light. After that, stir in 1/2 cup of crushed graham crackers. This will give a nice crunch to your ice cream. Pour the entire mixture into an airtight container. Freeze it for at least 4 hours or until it is firm. When you’re ready to enjoy, let it sit at room temperature for about 10 minutes. This makes scooping easier and more fun!
Tips & Tricks
Achieving the Perfect Texture
To get that creamy and dreamy texture, pay attention to your mixing. When you beat the cream cheese, make sure it is very smooth. This helps mix in the other ingredients easily. Also, whip the heavy cream until it forms soft peaks. This adds air and makes your ice cream light. When you fold in the strawberry puree, do it gently. You want to keep that fluffiness. Lastly, let the ice cream freeze long enough to get firm but not too hard.
Flavor Enhancements and Adjustments
Want to boost the flavor? Try adding a splash of orange or lemon zest. This adds a nice zing to your ice cream. You can also swap some strawberries for other fruits like raspberries or blueberries. If you like a sweeter taste, add more sugar to your strawberry mix. Just remember to taste as you go! This way, you can find the perfect balance for your palate.
Best Practices for Scooping
Scooping homemade ice cream can be tricky. To make it easier, let the ice cream sit out for about 10 minutes before scooping. This softens it just enough to help the scoop glide smoothly. Always use a warm ice cream scoop for the best results. Dip it in warm water for a few seconds before you scoop. This makes it easier and helps you get perfect servings. Store your ice cream in a flat container to make scooping simpler.
Pro Tips
- Maximize Strawberry Flavor: Use ripe, in-season strawberries for the best flavor and sweetness. This will enhance the overall taste of your ice cream.
- Texture Matters: For a smoother texture, strain the strawberry puree to remove seeds and pulp. This will result in a creamier ice cream.
- Experiment with Sweetness: Adjust the amount of granulated and powdered sugar based on your preference and the sweetness of your strawberries.
- Graham Cracker Crunch: For an extra crispy texture, bake the crushed graham crackers for a few minutes before adding them to the ice cream mixture.
Variations
Alternative Fruit Options
You can play with different fruits in this ice cream. For a tangier taste, try raspberries. Blueberries add a sweet burst, while peaches give a nice summer flavor. Each fruit brings its own twist. Just remember to adjust the sugar based on the fruit’s natural sweetness.
Vegan or Dairy-Free Adaptations
To make this ice cream vegan, swap cream cheese for a dairy-free version. Use coconut cream instead of heavy cream. Almond or oat milk works great in place of whole milk. For sweetening, use agave syrup or maple syrup. You can still enjoy a creamy treat without dairy!
Unique Mix-Ins and Flavors
Get creative with mix-ins! Try adding chocolate chips, nuts, or crushed cookies. Swirls of caramel or fudge can add depth to the flavor. You can also experiment with spices like cinnamon or nutmeg for a warm touch. Each mix-in gives a different taste and texture to your ice cream.
Storage Info
How to Store Homemade Ice Cream
Store your homemade strawberry cheesecake ice cream in an airtight container. This keeps it fresh and tasty. I like to use a container that fits the ice cream tightly. Press a piece of parchment paper against the surface before sealing. This helps prevent ice crystals from forming.
Best Practices for Freezing
Freeze the ice cream for at least 4 hours. For the best results, set your freezer to the coldest setting. Avoid opening the freezer too often. Each time you open it, warm air enters. This can affect the texture of your ice cream.
Shelf Life of Strawberry Cheesecake Ice Cream
When stored properly, your ice cream can last about 2 to 3 weeks. After that, it might lose flavor and texture. To enjoy it at its best, try to eat it within a week. If you notice ice crystals or a change in color, it’s time to toss it.
FAQs
Can I use frozen strawberries instead of fresh?
Yes, you can use frozen strawberries! They work well in this ice cream. Just make sure to thaw them before use. Drain any extra liquid to avoid a watery mix. The flavor will still shine through and keep your ice cream delicious.
How do I make this recipe nut-free?
To make this recipe nut-free, simply check all your ingredients. Use graham crackers that do not have nuts. Most brands are safe, but read labels carefully. This way, you can enjoy the creamy treat without worry.
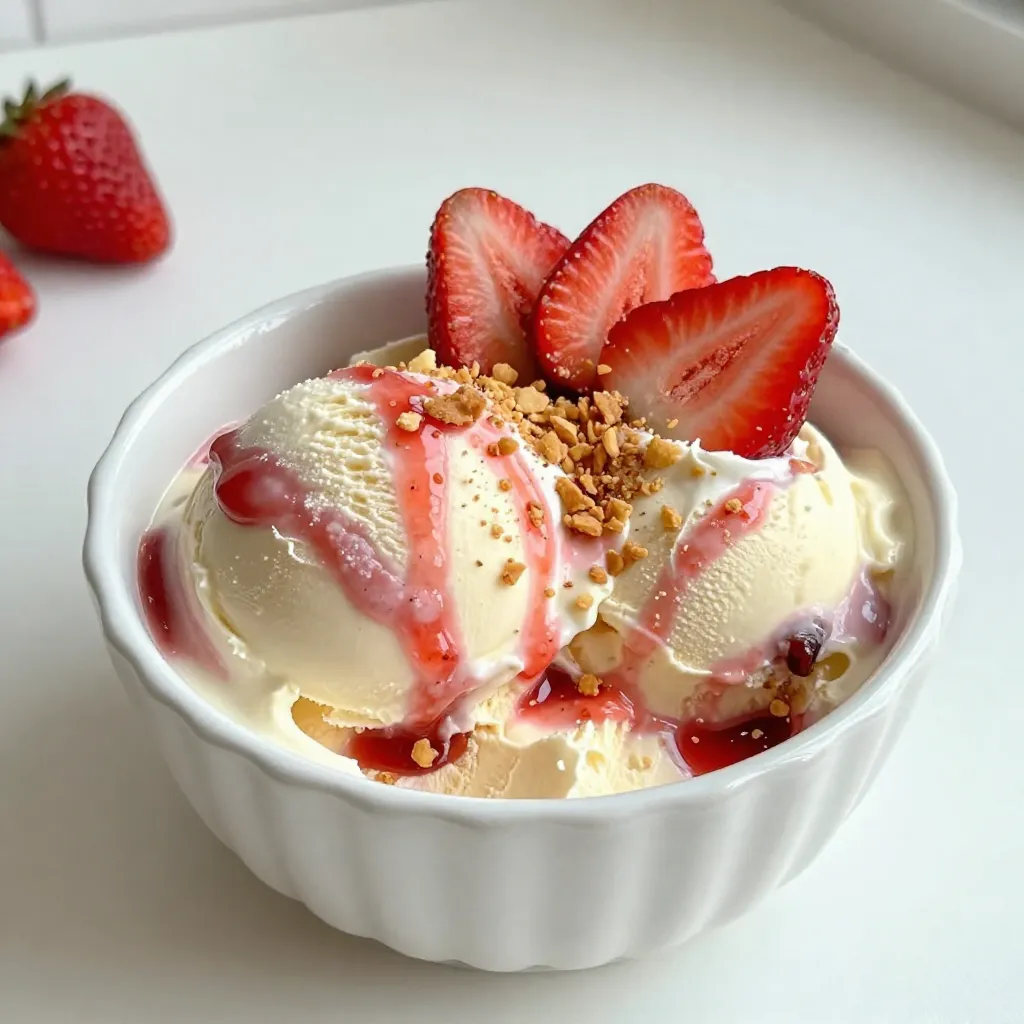
What are some serving suggestions for this ice cream?
Serve your strawberry cheesecake ice cream in chilled bowls. Top with fresh strawberry slices for a pop of color. A sprinkle of crushed graham crackers adds great crunch. You can also drizzle a bit of chocolate sauce for a fun twist!
This article covered making delicious strawberry cheesecake ice cream. We explored key ingredients, like fresh strawberries and dairy essentials. Next, I shared step-by-step instructions, ensuring you can easily follow along. I gave tips for perfect texture and flavor, plus tasty variations to try. Finally, I highlighted how to store your ice cream for maximum freshness. Enjoy treating yourself with this recipe, and don’t hesitate to get creative! You’ll impress your friends and family with your homemade trea